Linen shirts formed the base layer of all male clothing during the Tudor period. The underwear of the period seems to have been comprised of a long linen shirt which reached almost to the knees. The shirt I chose to make is a more fashionable example, but still follows the basic pattern that would have been seen in the period. From extant garments that survive in museum collections shirts were assembled from a variety of different sized squares and rectangles of linen. The shirt I have made was created of 1 body piece, 2 sleeves, 2 gussets, 2 cuffs, and 1 collar. All of the proportions were based off of the bara patterning system described in The Modern Maker (volumes 1 and 2). The body and sleeves are made of a midweight linen, with the collar being of a much finer grade of linen. In period a linen like what I used for the collar would probably been called a “cambric”.
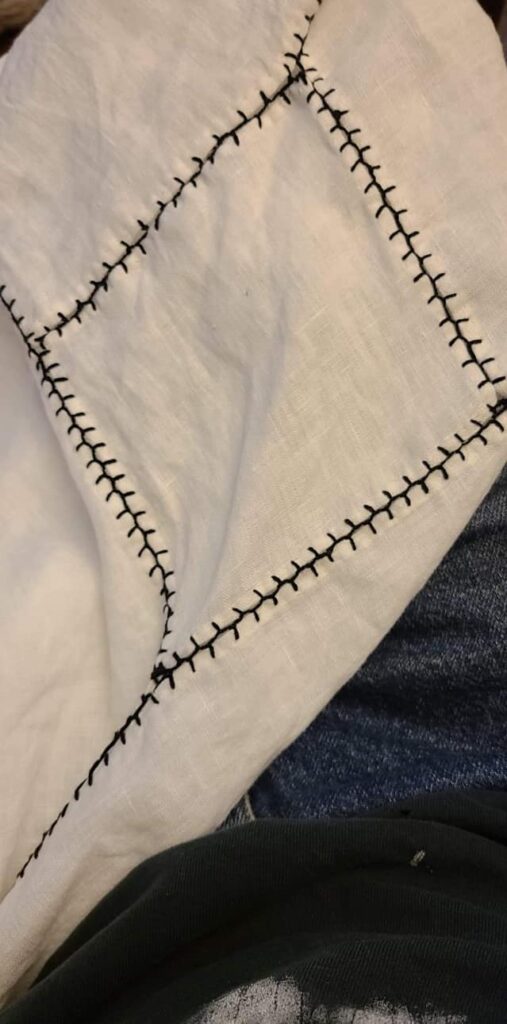
Instead of relying on a basic sewing stitch to join the pieces together I decided to use a decorative seam stitch. All parts of the shirt which were to be joined with the decorative stitch were first hemmed by hand using linen thread. They were then joined with essentially a modified blanket stitch in 20/2 silk thread. This stitch can be seen on several extant shirts covered in Patterns of Fashion 4, by Janet Arnold. Bellow is a video of me joining 2 parts of the shirt together.
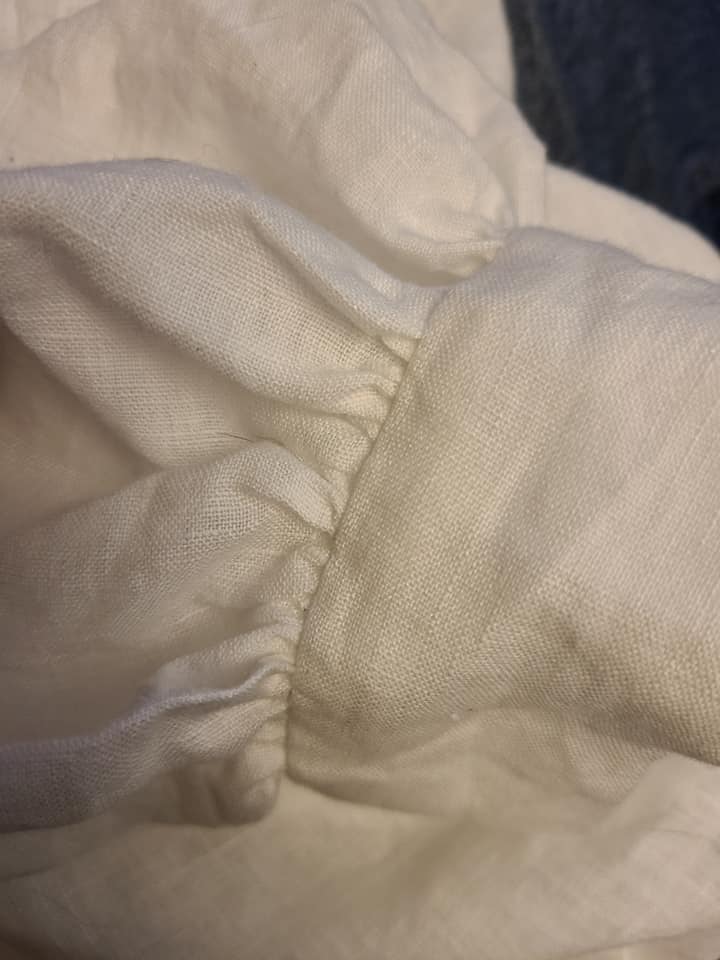
Not all parts of the shirt can be done with the decorative stitch, both the cuffs and collar opening needed to be gathered to fit. Once the larger pieces were gathered, it was stitched down with a backstitch.
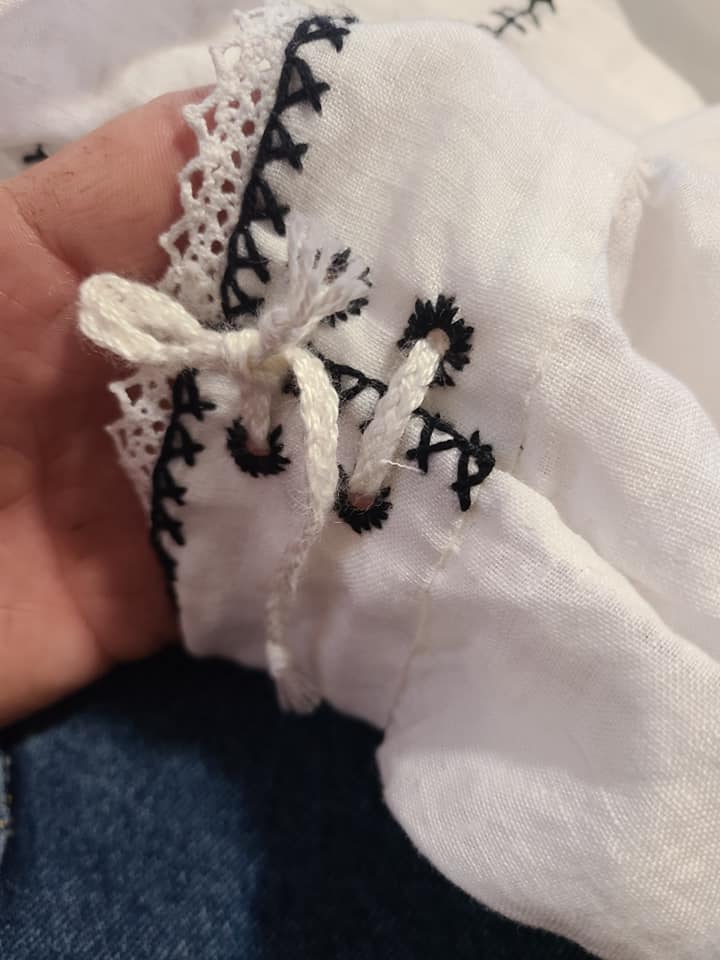
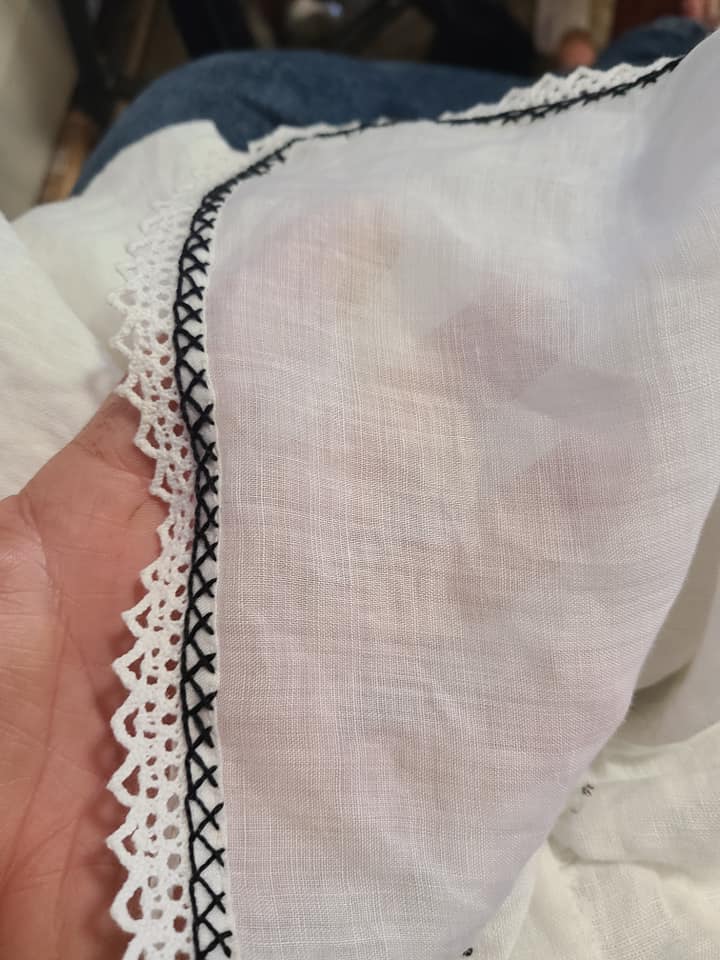
And because I cant leave well enough alone I also chose to decorate the shirt with both bobbin lace and an edge stitch (why learn one new stitch when you can learn two?). The stitch can be seen on a variety of extant shirts and other garments (Patterns of Fashion 4, 17th Century Women’s Dress Patterns Book 1 and 2)
The bobbin lace for this was purchased and is made of cotton, not linen which was the standard in period. However it is of a pattern that is very close to both surviving examples and those found in period art.
Bellow are various pictures of parts of the shirt.
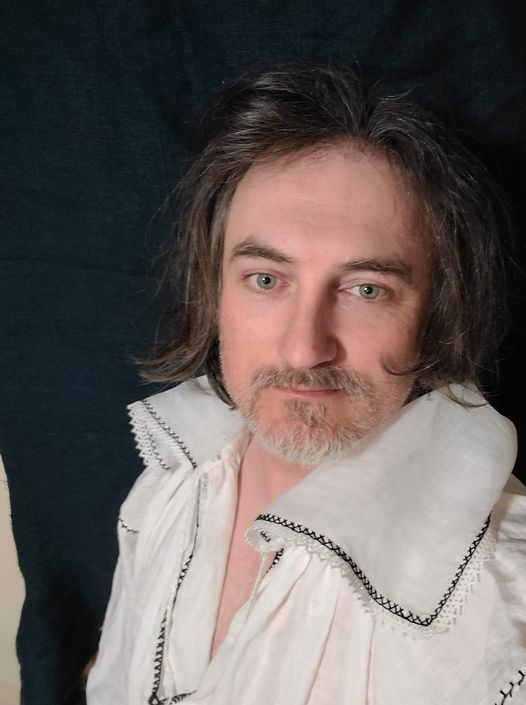
And the finished shirt on me (can’t tell you how hard it was to keep a straight face for this one)


YAAAAAY! Stitching Panels together with embrlidery stitches! It is so fine!
Arnold 4 is a wonderful book. It was worth the price just for the insights in to 16th C embroidery.
How long did this fine shirt take to make?
Thank you for showing us pictures. I suspect you will inspire others.
I’d been wanting to try this construction style for a while now. It went much faster than I thought it might. I began the shirt on Saturday morning.
Beautiful – the embroidery is just wonderful and transforms an ordinary garment into something special.