Down to the last few days of this challenge. And what better way to spend those days, than trying to push myself!
To help finish off my outfit I decided to sew a pair of linen hose (stockings). I came across an amazing pair of extant ones, with wonderful construction details on construction and decorations in a book put out by the Victoria and Albert Museum. The book 17th Century Men’s Dress Patterns, goes into wonderful detail about the construction and history of a variety of male garments dating from the first quarter of the 17th century. While most of the items covered are a touch outside of the SCA timeline, the linen hose I am making are dated to 1590-1620 period, so plausible for prior to 1600.
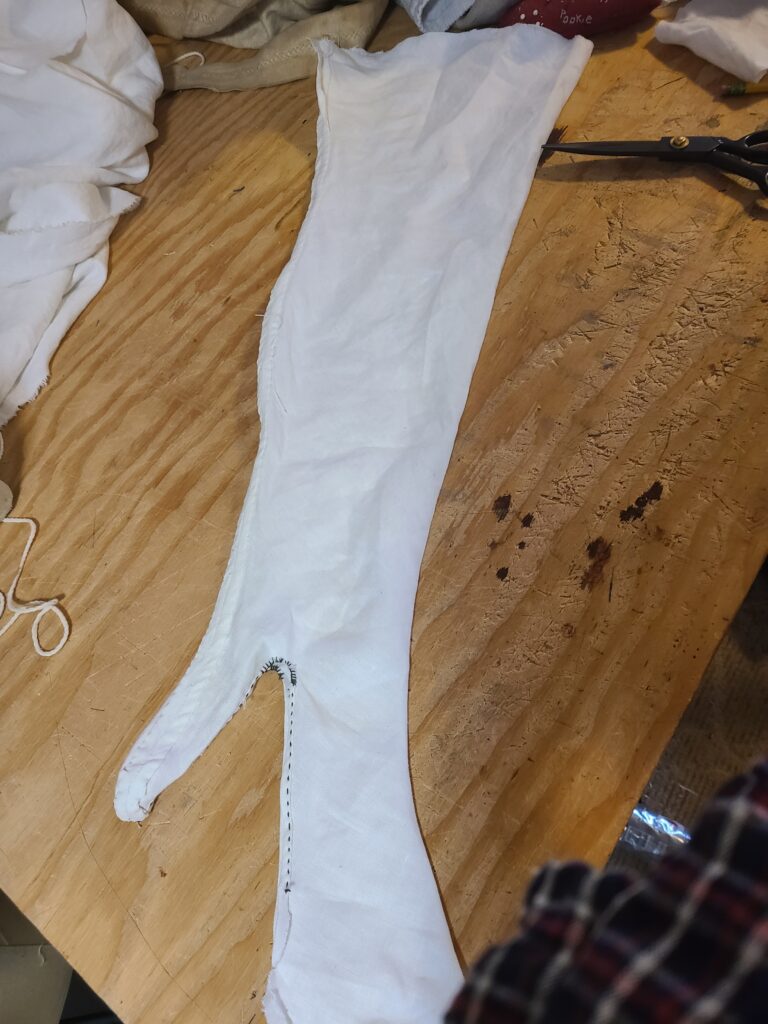
Because fabric hose require a fair amount of stretch to look and wear right, the plain woven linen fabric I used is cut on the bias. I have made a variety of wool hose of earlier styles, primarily joined 15th and early 16th century wool hose in the past, but this is the first time I’ve used linen. Normally I like to use twill woven wool cut on the bias as it has a fantastic amount of stretch, but I am pleasantly surprised by how well the plain woven linen fabric has worked out. Defiantly less forgiving than wool, but still allowed me to get a decently tight fit while still having the necessary stretch in the linen. For these hose I used my old tried and tested hose pattern, which I modified so that they ended thigh height. The construction of the extant ones is a bit different than the earlier period hose I’ve made in the past but given the time crunch I wasn’t going to try and reinvent the wheel so it ened up a bit of a mish mash of patterns. I had to simplify the pattern from the museum ones, they feature a lace up gusset on one side of the hose, I’ve also simplified the decorative stitching.
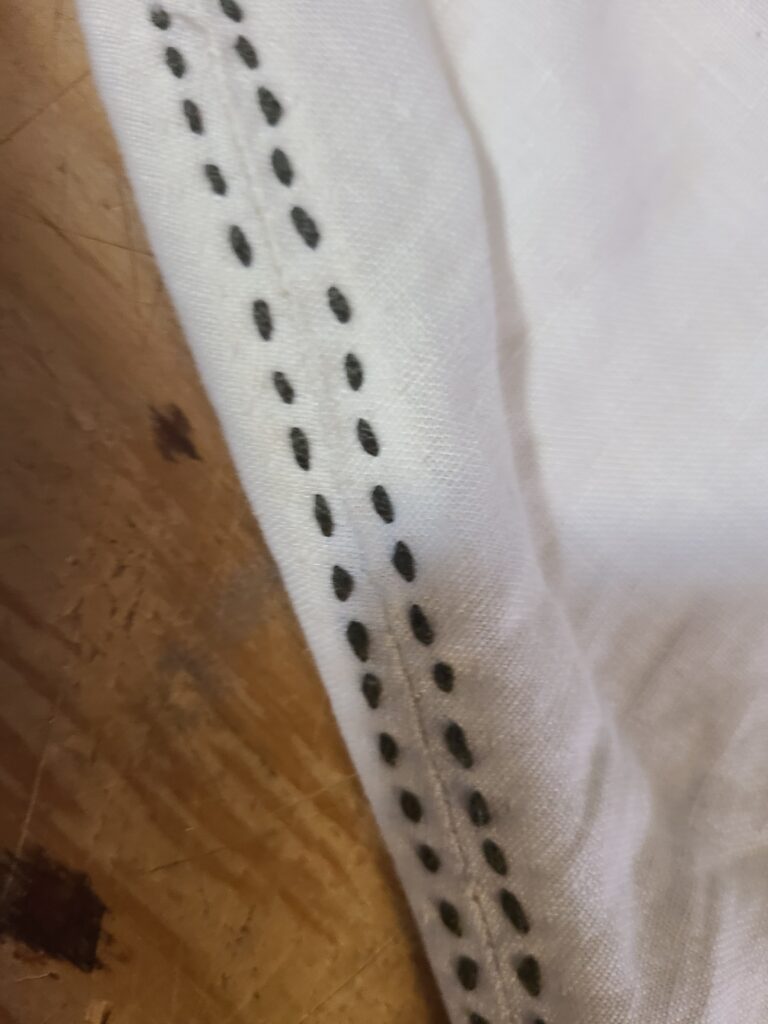
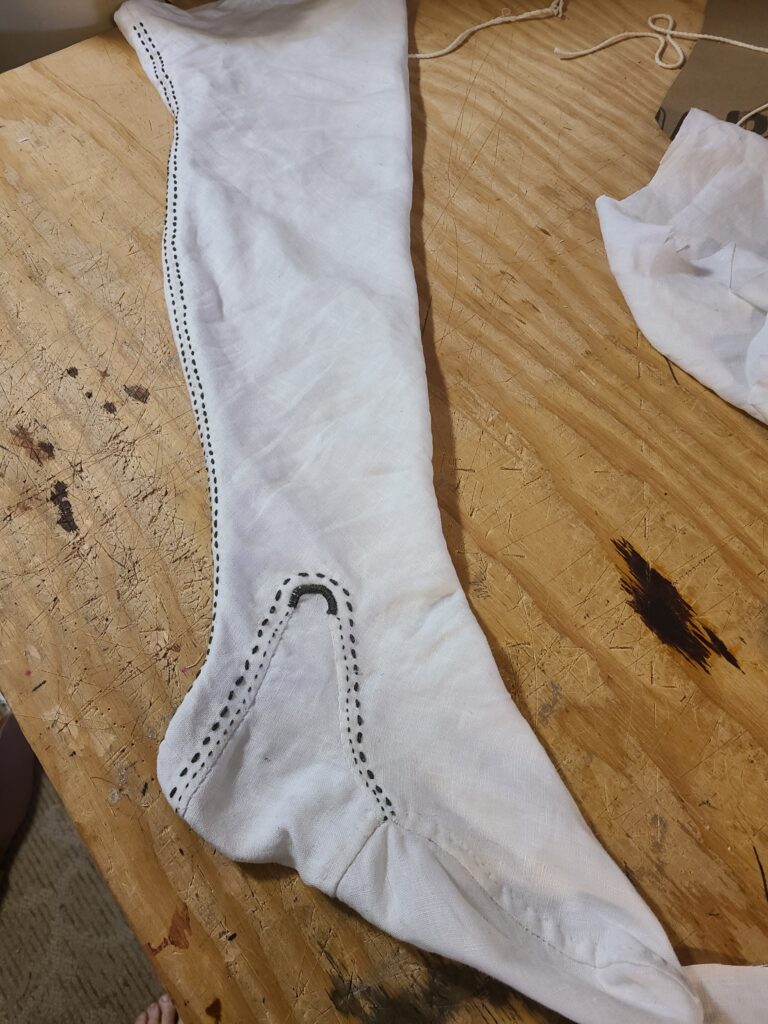
Once I had the fit on the back seam set correctly (loads of fun by the way doing this with a pulled muscle in my leg…), the back seam was stitched up with linen thread and the seam allowances felled down. Once that was done I ran a line of spaced stem stitches in silk thread along both sides of the seam. Before the ankle gusset and sole bits are installed the edges of the gusset opening are rolled. The gusset is installed first and stitched in place by felling the edges and then sewing down with stem stitch, and a buttonhole stitch at the top. The last part was to attach the sole, which was back stitched in place and felled in linen thread.
Now to repeat the process for the second one!

Very even running stitch. Contrast color construction stitching counts as Embroidery in my world. Well Done.